Table of Content
- 1. What is an LED strip light?
- 2. Components that affect the finished installation
- 3. Main LED strip types and how to choose
- 3.1 SMD, COB and CSP
- 3.2 Indoor, outdoor and wet locations
- 3.3 Single-color, tunable white and RGB variants
- 3.4 Flexible strips and bend direction
- 3.5 Input voltage
- 3.6 Constant-voltage and regulated circuits
- 3.7 SMD package size
- 3.8 Front-emitting and side-emitting designs
- 3.9 Analog and addressable control
- 3.10 Cut interval and finished length
- 4. Turn feature claims into sample acceptance criteria
- 5. Compare the complete project cost
- 6. Verify quality against the exact model
- 7. Prepare a useful LED strip inquiry
- 8. Plan power for the whole installation
- 9. Connect only compatible strips and controls
- 10. Installation and maintenance checks
- 11. Match the assembly to its application
- 12. Compare LED strip manufacturers by evidence
- 13. LED strip ordering FAQ
- What is the minimum order quantity?
- Are LED strips normally in stock?
- Can an urgent LED strip order ship within three days?
- What warranty applies?
- Which payment methods and deposits are available?
- Is an IP68 LED strip approved for every pool or outdoor installation?
- Does a five-year warranty mean a fixed operating life?
- What should I send for a custom quotation?
- 14. Request a model-specific proposal
LED Strip Light Buying Guide: Specifications, Power and Project Checks
Choose an LED strip by the finished lighting result, installation conditions and electrical design. This guide explains what to compare in a model-specific quotation, which details need sample approval, and what to send when requesting standard or custom LED strips.
Y&T Technology Development Co.,Limited. has focused on LED lighting, especially LED strips, since 2012. We supply standard and custom strips, with power supplies and accessories selected for the project. Start with our LED products or send your requirements for a quotation.
Request an LED strip quotation
1. What is an LED strip light?
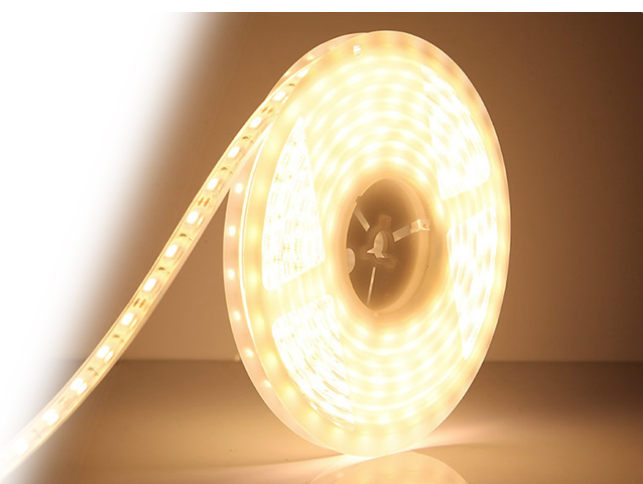
An LED strip is a linear circuit with LEDs and the components required by its design. Flexible strips can follow permitted bends; rigid strips need a different mounting approach. Bare strips, sealed strips and neon flex are different assemblies: compare the complete product, including its coating, housing, connectors and mounting method.
1.1 Specifications to compare in a quotation
| Specification | Procurement check |
|---|---|
| Supply and loading | Rated input V DC, power W/m, total installed length m, maximum permitted run and feed arrangement. |
| Light output | Flux lm/m or the stated tested length; efficacy lm/W at the stated power, temperature and measurement conditions. |
| White light quality | CCT in K, CRI and any required color rendering or color consistency data. Approve the actual sample and batch requirement. |
| Dimensions | PCB and finished assembly width in mm, cut interval in mm, reel length in m, connector clearance and permitted bend direction. |
| Environment and control | IP rating with test scope, allowed operating conditions, dimming method, controller protocol and channel loading. |
A package size or LED count alone does not establish brightness, efficacy or service life. For an example of how a component supplier separates ratings by model, see the Bridgelux LED strip specification tables; those are supplier examples, not Y&T product ratings.
2. Components that affect the finished installation
2.1 LEDs and light quality
Compare the specified light output, color and consistency at the intended operating point. COB, SMD and CSP describe different packaging approaches; they do not by themselves guarantee a particular lifespan, efficiency or thermal result. See our COB and SMD LED strip comparison.
2.2 Circuit board and heat path
Check board dimensions, conductor design and the intended heat path into the mounting surface or profile. A wider board is not automatically brighter. Request the maximum run and installation conditions for the quoted model.
2.3 Resistors, regulators and control circuits
Resistor-based, regulated and addressable circuits have different supply and control requirements. An integrated control IC does not automatically mean constant-current input. Match the actual circuit and controller; our integrated control circuit guide explains the distinction.
2.4 Diffusers, lenses and profiles
A diffuser can improve the appearance of a line of light while changing delivered output and color. Profile depth, diffuser spacing and viewing distance influence visible spots. Approve the strip and optical assembly together.
2.5 Coatings, adhesive and end seals
Confirm the coating, backing tape, end caps and cable exits for the quoted assembly. Adhesive brand, chemical resistance, UV resistance and adhesion to a particular surface require confirmation; they are not standard claims for every strip.
2.6 Power supplies and accessories
Include compatible power supplies, controllers, connectors, cable, profiles and mounting parts in the bill of materials. Check electrical loading, conductor sizes, physical fit and environmental limits. A connector that fits the strip width may still have an insufficient current rating.
3. Main LED strip types and how to choose
3.1 SMD, COB and CSP
SMD LED strips use discrete LED packages; COB LED strips use a closely spaced emitting structure for a more continuous appearance. Check real samples in the planned profile. Neither construction is the best choice for every project.
3.2 Indoor, outdoor and wet locations
Select environmental protection for the complete installation. An IP rating describes specified ingress tests; it does not establish suitability for all outdoor exposure, cleaning chemicals, pools or high-pressure washing. IP68 is not a universal highest rating. Immersion conditions and assembly details must be documented for the exact product.
Read our LED strip IP rating guide and Intertek ingress protection guidance. For pools, spas or other underwater lighting, assess the complete intended luminaire and applicable project requirements; UL pool and marine lighting guidance explains why a low supply voltage or IP number alone is insufficient.
3.3 Single-color, tunable white and RGB variants
Choose single-color for a fixed light color, tunable-white strips for adjustable white, and RGB plus white strips when colored light and a separate white channel are needed. Confirm channel count, color range, wiring and controller compatibility. A color label does not guarantee a smart-home protocol.
3.4 Flexible strips and bend direction
Confirm the minimum bend radius, bend direction and straight sections around joints for the exact assembly. Do not crease a strip or bend across components. Side-bending and top-bending neon flex are not interchangeable.
3.5 Input voltage
Use the exact rated supply. Low-voltage DC strips and mains-voltage products require different designs and installation precautions. Never infer maximum run length from 12 V or 24 V alone; use the model’s power, conductor design and approved feed layout.
3.6 Constant-voltage and regulated circuits
Determine whether the strip needs a constant-voltage supply, a specified constant-current driver, or a regulated circuit supplied at a stated voltage. The words “constant current” in a circuit description do not settle the external power supply selection. Obtain the connection specification.
3.7 SMD package size
Numbers such as 2835 or 5050 describe a package format. Output, power, white quality and functions vary between parts and finished strips with the same nominal format. Compare the complete model data.
3.8 Front-emitting and side-emitting designs
Choose emission direction around the intended viewing direction, profile and mounting space. Validate the resulting line of light in a sample assembly instead of assuming a universal beam angle.
3.9 Analog and addressable control
Analog strips are generally controlled by channel; addressable products allow control of defined pixels or segments. Confirm the actual protocol, controller, grouping, data wiring and software support. Digital control does not guarantee an independently controllable LED at every position.
3.10 Cut interval and finished length
Cut only at the marked points allowed by the model. Include end caps, cable exits and connector clearance in the finished dimensions. Specify acceptable length tolerance and required factory termination when ordering.
4. Turn feature claims into sample acceptance criteria
Replace broad requests such as “very bright” or “no dots” with a target: required output, color, profile, viewing distance, dimming behavior and installation length. Approve a sample in the intended assembly. Any flicker, thermal or noise requirement needs a defined measurement method and acceptance limit.
5. Compare the complete project cost
5.1 Strip materials and construction
LED selection, circuit board, conductor design, color consistency, coating and factory termination influence price. There is no fixed material-cost percentage for all strips. Compare quotations at the same specification and quantity.
5.2 Production and verification
Custom dimensions, additional inspection, sample iterations and project-specific testing can affect cost and schedule. Confirm what is included in the quotation rather than assuming a fixed manufacturing-cost share.
5.3 Accessories and installation parts
Budget for the approved supply, controller, cable, connectors, profiles, diffusers and mounting parts. Compare the complete bill of materials and delivered lighting result.
5.4 Packing, documents and delivery
State packing, labeling, destination, shipping method and required documents before quotation. Dispatch and transit are separate stages; freight, duties and local installation costs depend on the agreed commercial terms.
6. Verify quality against the exact model
6.1 Photometric performance
Request model-linked data for power and light output, the selected CCT and required color rendering. Record measurement conditions and the agreed production tolerance. Photographs alone cannot verify flux, efficacy or color consistency.
6.2 Construction and mechanical fit
Check width, cut interval, joints, mounting, connector retention and the finished coating or enclosure. Test fit with the actual profile and diffuser. Confirm any material, adhesive or component-brand requirement in writing.
6.3 Electrical safety and documents
Ask which reports or declarations cover the exact model, construction and destination market. A company-level statement does not certify every product. Verify the document number, issuer, scope and validity; US, European and Singapore project requirements can differ.
6.4 Installed sample checks
Check output uniformity at the planned run length, temperature under the specified mounting conditions, controller operation and connector loading. Agree environmental and endurance tests where relevant. A short sample run does not establish a universal 50,000-hour service life.
6.5 Supplier and warranty verification
Link the quotation, approved sample, model identification, batch requirements and documents. Y&T provides a 5-year warranty for LED strips, including custom strips, and a 3-year warranty for power supplies and accessories. Confirm the applicable operating conditions, exclusions and claim procedure in the written quotation or warranty terms; warranty duration is not a guaranteed operating lifetime.
7. Prepare a useful LED strip inquiry
- Identify the application, indoor/outdoor conditions and mounting or profile.
- Specify a model or desired strip family, color/CCT, light output and control method.
- Provide length per run, total quantity, input supply and required factory terminations.
- Give destination country, required dispatch or arrival date, and required product documents.
- Attach drawings or a bill of materials where available. For custom work, identify dimensions, cable exits, labels and sample approval criteria.
Use our custom LED strip service to discuss nonstandard requirements. Actual feasibility, minimum quantity and testing depend on the requested design.
8. Plan power for the whole installation
8.1 Establish the electrical load
Use the selected strip’s rated voltage, stated power and installed length. Include controllers and other loads as applicable. Measure the approved sample under the intended conditions when the project requires verified consumption.
8.2 Select the matching power supply
Match the required output mode and voltage or current range, load limits, dimming interface and environment. Follow the exact supply’s derating, startup and thermal instructions; there is no single headroom percentage suitable for every installation. See MEAN WELL LED power supply application FAQ.
8.3 Design feeds, wiring and protection
Plan permitted run lengths, feed points and cable sizes using strip current, cable length, voltage drop and connector ratings. Joining the end of another reel does not make the longer run acceptable. Obtain a project wiring layout; do not substitute a universal 5 m or 10 m rule.
8.4 Installation responsibilities
Use suitably rated equipment and follow the relevant product instructions and local installation requirements. Mains connections and protective measures require appropriate professional competence. Keep supplies accessible with their specified ventilation and environmental protection.
9. Connect only compatible strips and controls
Verify polarity, terminal labels, pad spacing, channel count and connector loading. Disconnect power before cutting or making connections. Addressable strips also need the correct data direction and compatible protocol. Test a short assembly before completing the installation.
10. Installation and maintenance checks
10.1 Before mounting
Check the model and quantity against the approved sample. Before switching on a test, follow the model’s instructions for unrolling, mounting and heat dissipation. Prepare the specified mounting surface and supports, and preserve required seals at terminations.
10.2 Controller setup
Match strip type, voltage, channel or pixel loading, dimming interface and any required network protocol. Our single-color strip controller category is one starting point; confirm that the quoted controller and power supply are compatible with the selected LED strip.
10.3 Troubleshooting and maintenance
For dim ends or uneven color, check feed layout, voltage drop, load and thermal conditions. For missing colors, check channel mapping and connections. For addressable faults, check protocol and data direction. Isolate power before inspection and retain model, batch and installation details for support.
11. Match the assembly to its application
Coves, display cabinets, architectural details, signage and hospitality lighting have different optical and mounting needs. Outdoor, food-contact, chemical-exposure or underwater projects need explicit assessment of the complete assembly and environment. Do not select a strip for these uses from a photograph or IP label alone.
12. Compare LED strip manufacturers by evidence
Evaluate how a supplier links model data, sample approval, repeat-order consistency, documents, warranty and production schedule. Y&T Technology Development Co.,Limited. has focused on LED lighting since 2012. Ask us to confirm the exact strip and accessory package for your project; unsupported rankings or generic certification lists are not substitutes for model-specific evidence.
13. LED strip ordering FAQ
What is the minimum order quantity?
Standard LED strips normally start at 5 m, or one roll. Custom strips and accessories are quoted by model and project.
Are LED strips normally in stock?
Most strips are made to order. Standard production usually takes about 10 days; custom sampling about 10 days; custom production about 15 days, after payment and specification confirmation. Confirm the actual production schedule in the quotation. Production time does not include transport time.
Can an urgent LED strip order ship within three days?
The fastest confirmed dispatch date for an eligible rush LED strip order can be 3 days after ordering. We must confirm the model, quantity and rush production schedule first. Confirm the exact dispatch date before ordering. The shipping carrier’s transport time is additional.
What warranty applies?
LED strips, including custom strips: 5 years. Power supplies and accessories: 3 years. Confirm model-specific operating conditions and the written warranty terms when ordering.
Which payment methods and deposits are available?
We accept T/T, Western Union and PayPal. Standard orders normally require a 30% deposit; custom orders normally require a 50% deposit. Confirm the balance, fees and transaction details in the quotation.
Is an IP68 LED strip approved for every pool or outdoor installation?
No. Review the tested assembly, immersion conditions, material exposure, connections and the intended use. Pool lighting needs assessment of the complete luminaire and installation requirements.
Does a five-year warranty mean a fixed operating life?
No. Warranty duration and operating lifetime are different. Use an operating lifetime figure only when it is supported by evidence for the exact model and stated operating conditions.
What should I send for a custom quotation?
Send the lighting application, dimensions or drawing, color/output requirement, control method, quantity, destination and required date. Identify the documents and sample acceptance criteria you need.
14. Request a model-specific proposal
Send your lighting project details and key requirements so we can confirm a suitable LED strip, matching accessories, documents, price and dispatch schedule. Avoid treating generic guide examples as a rating or approval for a particular model.